Avoid These Common Mistakes When Installing Glass Balustrade
- Introduction: Installing a glass balustrade can enhance the beauty and safety of your property. However, it’s crucial to avoid common mistakes that can compromise the integrity and functionality of the installation. This article highlights the top mistakes to avoid and provides a step-by-step guide to help you install a glass balustrade correctly.
- Importance of Proper Installation: Proper installation of a glass balustrade is essential for ensuring structural stability, safety, and longevity. A poorly installed balustrade can lead to accidents, breakage, and expensive repairs. By understanding and avoiding common mistakes, you can achieve a flawless installation that meets safety standards.
- Top Mistakes to Avoid:
3.1 Incorrect Measurement and Planning: Accurate measurement and planning are crucial for a successful glass balustrade installation. Failing to measure correctly can result in ill-fitting glass panels, uneven spacing, or insufficient structural support. Take your time, double-check measurements, and create a detailed plan before starting the installation process.
3.2 Neglecting Structural Integrity: Ignoring the structural integrity of the supporting elements can lead to a weak and unstable glass balustrade. Ensure that the base and anchor points can withstand the weight and pressure of the balustrade. Consult a professional if you are unsure about the structural soundness of your installation.
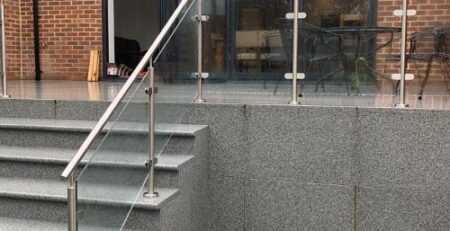
3.3 Poor Quality Glass and Hardware: Using low-quality glass and hardware compromises the safety and durability of the balustrade. Invest in tempered safety glass that meets relevant standards and choose high-quality fittings, such as clamps and brackets. Inferior materials can break easily, pose safety hazards, and require frequent replacements.
3.4 Inadequate Installation Techniques: Improper installation techniques can result in an unstable and unsafe glass balustrade. Follow the manufacturer’s guidelines and best practices when installing the balustrade system. Ensure proper alignment, secure fixings, and use appropriate tools to achieve a secure and professional installation.
3.5 Lack of Compliance with Safety Regulations: Failure to comply with safety regulations can result in serious consequences. Familiarize yourself with local building codes and safety standards to ensure your installation meets the necessary requirements. Non-compliant installations can lead to legal issues, insurance problems, and safety hazards.
- Step-by-Step Guide to Installing Glass Balustrade:
4.1 Measure and Plan: Accurately measure the installation area, including height, width, and any angles or slopes. Create a detailed plan to determine the number of glass panels required and the spacing between them.
4.2 Ensure Structural Integrity: Inspect the base and supporting structure to ensure it can bear the weight and pressure of the glass balustrade. Reinforce weak points if necessary and consult a structural engineer if you have concerns.
4.3 Select High-Quality Materials: Invest in tempered safety glass that conforms to relevant standards. Choose stainless steel or corrosion-resistant hardware to ensure longevity and stability.
4.4 Follow Proper Installation Techniques: Follow the manufacturer’s guidelines for installing the glass balustrade system. Use a level to ensure the panels are aligned correctly, and secure them with appropriate fittings and fixings.
4.5 Comply with Safety Regulations: Research and comply with local safety regulations and building codes. This includes handrail heights, spacing between glass panels, and load-bearing requirements. Obtain any necessary permits or certifications.
- Conclusion: By avoiding common mistakes and following proper installation techniques, you can achieve a safe and visually appealing glass balustrade. Take the time to measure accurately, use high-quality materials, and adhere to safety regulations for a successful installation that will stand the test of time.